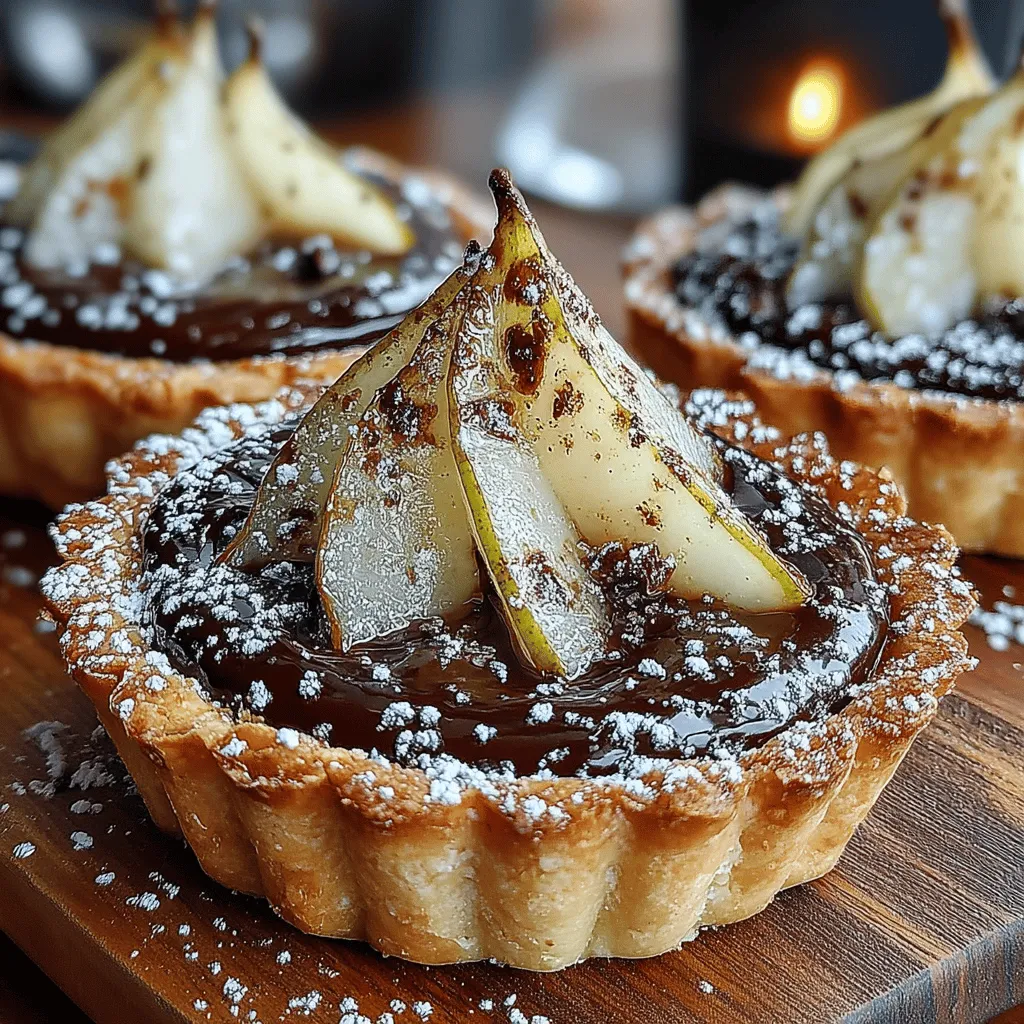
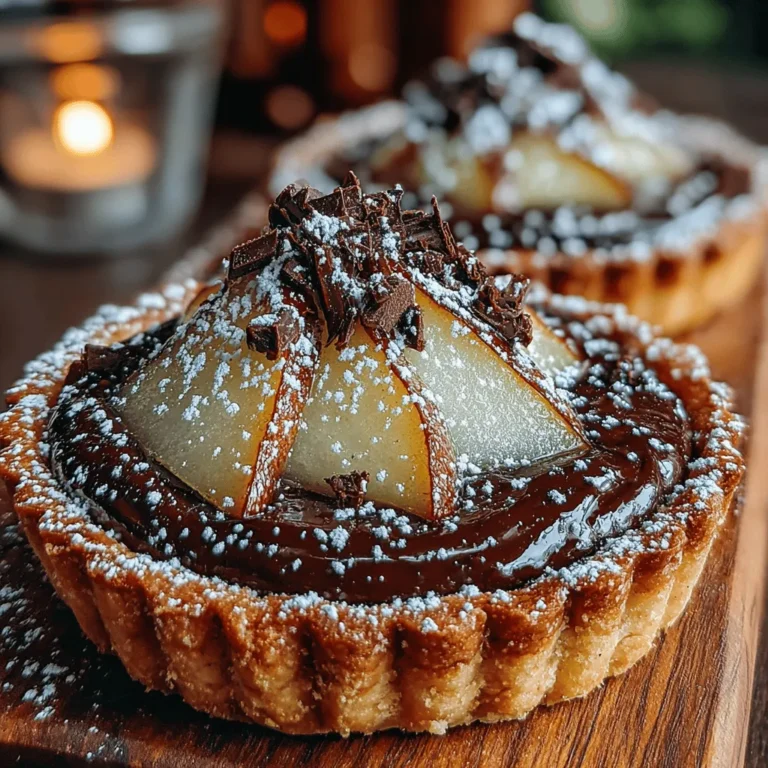
The combination of pears and chocolate is a timeless classic, evoking images of indulgence and sophistication. The sweet, juicy flavor of ripe pears harmonizes beautifully with the rich, velvety essence of chocolate, making it a pairing that excites the palate. When crafted into tartlets, this duo transforms into an elegant dessert that’s perfect for any occasion, from intimate gatherings to celebratory feasts. Tartlets offer a delightful twist on traditional pies, presenting individual portions that are both visually appealing and easy to serve.
In this article, we will guide you through the process of making delectable pear and chocolate tartlets. Whether you are a seasoned baker or a novice in the kitchen, this detailed recipe will help you create a dessert that impresses and delights.
Understanding the Ingredients
The success of any recipe hinges on the quality of its ingredients, and this holds especially true for pear and chocolate tartlets. The main components of this dessert include fresh pears, high-quality chocolate, butter, flour, sugar, and eggs. Each ingredient plays a crucial role in creating the delicious balance of flavors and textures that make these tartlets so irresistible.
The Importance of High-Quality Ingredients
When it comes to chocolate, opting for a bar with a cacao content of 60-70% is ideal. Dark chocolate in this range strikes the perfect balance between sweetness and depth, providing a robust flavor that complements the subtle sweetness of the pears. Additionally, the higher cacao content means a richer and more complex chocolate experience, which is essential for a dessert that revolves around these two key ingredients.
Selecting ripe pears is equally important. Look for pears that yield slightly to gentle pressure, indicating they are at the peak of ripeness. Varieties such as Bartlett, Bosc, or Anjou work wonderfully in desserts, as they soften beautifully when baked and add a luscious texture to the filling.
The Role of Each Ingredient
– Pears: Provide natural sweetness and moisture to the filling.
– Chocolate: Offers richness and depth, creating a luxurious base for the tartlets.
– Butter: Adds flavor and helps create a tender texture in the crust.
– Flour: Forms the structure of the tartlet shell, providing stability.
– Sugar: Sweetens the dough and contributes to browning during baking.
– Egg Yolk: Enriches the dough, adding to its tenderness and flavor.
Preparation of Tartlet Shells
Creating the perfect tartlet shell is the foundation of any great tartlet. The crust should be flaky, buttery, and sturdy enough to hold the luscious filling without becoming soggy. Here’s how to prepare the tartlet shell step-by-step.
Step-by-Step Instructions for Preparing the Dough
1. Gather Ingredients: Start by measuring out the flour, cold unsalted butter, sugar, and egg yolk. You’ll want your butter to be as cold as possible to ensure a flaky texture.
2. Combine Dry Ingredients: In a large mixing bowl, whisk together the flour and sugar until well combined. This ensures even distribution of sweetness throughout the dough.
3. Incorporate Butter: Cut the cold butter into small cubes and add it to the flour mixture. Using a pastry cutter or your fingertips, work the butter into the flour until the mixture resembles coarse crumbs. This step is crucial as it creates the flaky texture of the crust.
4. Add Egg Yolk: Create a well in the center of the mixture and add the egg yolk. Mix gently until the dough begins to come together. If the dough seems too dry, you can add a teaspoon of cold water at a time until it holds together without being sticky.
5. Knead Gently: Turn the dough out onto a lightly floured surface and knead it gently just until it forms a cohesive ball. Be careful not to overwork the dough, as this can lead to a tough crust.
6. Chill the Dough: Wrap the dough in plastic wrap and refrigerate for at least 30 minutes. Chilling is essential as it helps the butter solidify, which in turn prevents the dough from shrinking during baking and ensures a tender, flaky crust.
Tips for Achieving the Perfect Consistency
– Use Cold Ingredients: Always use cold butter and chilled egg yolk to maintain the right texture.
– Don’t Overmix: Mix just until combined to avoid developing gluten, which can make the crust tough.
– Check Dough Texture: The dough should be soft but not sticky, allowing for easy rolling out.
Baking Tartlet Shells
Once your dough has chilled, it’s time to roll it out and shape it into tartlet shells. This step requires precision to ensure even thickness and a beautifully golden crust.
Instructions for Rolling Out and Shaping the Dough
1. Prepare the Surface: Lightly flour your work surface to prevent sticking. Roll out the chilled dough to a thickness of about 1/8 inch.
2. Cut Out Circles: Using a round cutter or the rim of a glass, cut circles from the dough. These will form the bases of your tartlets. Make sure to cut enough circles to fit your tartlet pans, typically 3 to 4 inches in diameter.
3. Transfer to Tartlet Pans: Carefully transfer each dough circle to the tartlet pans, pressing it gently into the bottom and up the sides. Trim any excess dough hanging over the edges.
Techniques for Ensuring Even Thickness
– Use a Rolling Pin with Guides: Consider using a rolling pin with thickness guides or a pasta machine to achieve uniform thickness.
– Rotate the Dough: Rotate the dough as you roll to maintain an even shape and thickness.
Baking Tips for a Golden Crust
1. Preheat the Oven: Make sure your oven is preheated to the right temperature before baking the tartlet shells.
2. Prick the Dough: Use a fork to prick the bottom of each tartlet shell. This prevents the dough from puffing up during baking.
3. Blind Bake: To ensure a crispy bottom, consider blind baking your tartlet shells. Line the shells with parchment paper and fill them with pie weights or dried beans. Bake for about 10-15 minutes until they are lightly golden.
With the tartlet shells prepared and pre-baked, you are now ready to move on to crafting the rich chocolate filling that will complete your pear and chocolate tartlets. The next steps will guide you through creating a smooth, decadent filling that perfectly complements the sweetness of the pears.

Creating a mouthwatering dessert can be a rewarding experience, and these Pear & Chocolate Tartlets are no exception. With their rich chocolate filling and sweet, juicy pears, they are sure to impress your friends and family. Let’s dive into the essential steps for crafting these delightful tartlets, including tips for melting chocolate, preparing the pear topping, assembling the tartlets, and serving suggestions.
Tips for Melting Chocolate Properly
Melting chocolate may seem straightforward, but it requires careful attention to avoid seizing. Here are some tips to ensure your chocolate remains smooth and creamy:
1. Use a Double Boiler: The gentler heat provided by a double boiler helps prevent chocolate from burning. Fill a pot with a couple of inches of water and bring it to a simmer. Place a heatproof bowl on top, ensuring it doesn’t touch the water. Add your chocolate to the bowl and stir gently as it melts.
2. Microwave Method: If you prefer a quicker method, you can use the microwave. Place the chocolate in a microwave-safe bowl and heat it in short bursts of 15-20 seconds, stirring in between. This approach reduces the risk of overheating.
3. Avoid Moisture: Water is chocolate’s enemy. Even a small amount of moisture can cause chocolate to seize. Make sure all utensils and bowls are completely dry before starting the melting process.
4. Use High-Quality Chocolate: Opt for good-quality chocolate with a cocoa content of around 60-70%. This ensures a rich flavor that pairs beautifully with the pears.
Importance of Allowing the Filling to Cool Before Adding the Egg and Sugar
Once your chocolate is melted and combined with cream and butter, it’s essential to let the mixture cool before adding the egg and sugar. If you add these ingredients to hot chocolate, the egg can scramble, leading to an unappetizing texture. Allow the filling to cool to room temperature. This step ensures that the final filling has a smooth consistency and rich flavor, enhancing the overall quality of your tartlets.
Preparing the Pear Topping
The pear topping is a critical component of these tartlets. Here’s how to prepare it perfectly:
1. Choose the Right Pears: Select ripe but firm pears, such as Bosc or Anjou. They hold their shape well during baking and provide a natural sweetness that complements the chocolate.
2. Peel and Slice the Pears: Start by peeling the pears and cutting them in half. Remove the core and then slice each half into thin wedges. Aim for uniform slices to ensure even cooking.
3. Flavoring the Pears: In a mixing bowl, combine the sliced pears with a tablespoon of lemon juice and a couple of tablespoons of brown sugar. The lemon juice adds brightness and prevents browning, while the brown sugar enhances the natural sweetness of the pears.
4. Letting the Pears Sit: Allow the pear mixture to sit for at least 15-20 minutes. This resting period enables the pears to absorb the flavors of the lemon juice and brown sugar, enhancing their taste and creating a delightful contrast with the rich chocolate filling.
Assembling the Tartlets
With the tartlet shells baked, the chocolate filling cooled, and the pears prepared, it’s time to assemble the tartlets:
1. Fill the Tartlet Shells: Spoon the cooled chocolate filling into each tartlet shell. Fill them to about three-quarters full, leaving enough space for the pear topping without risking overflow during baking.
2. Arrange the Pear Slices: Neatly arrange the pear slices on top of the chocolate filling. You can overlap the slices slightly for a beautiful presentation. Consider a fan shape or circular arrangement to create visual appeal.
3. Avoiding Overflow: Ensure that the filling doesn’t exceed the top of the tartlet shell. A proper fill will prevent the chocolate from bubbling over during the second baking, which can lead to a messy presentation and uneven cooking.
Final Baking and Cooling Process
Now that your tartlets are assembled, it’s time for the final baking:
1. Second Baking: Preheat your oven to 350°F (175°C). Place the assembled tartlets on a baking sheet for easier handling and bake for about 15-20 minutes. The chocolate filling should be set, and the pears should appear tender.
2. Check for Doneness: To check if the tartlets are done, gently shake the baking sheet. The filling should be slightly jiggly but firm enough to hold its shape. Avoid overbaking, as this can lead to a dry texture.
3. Cooling Process: Once baked, allow the tartlets to cool in the pan for about 10 minutes. Then, transfer them to a wire rack to cool completely. Cooling is crucial as it allows the chocolate to set properly, resulting in a luscious texture that melts in your mouth.
Serving Suggestions
These Pear & Chocolate Tartlets are not only delicious but also visually stunning. Here are some ideas for serving them:
1. Presentation Tips: Dust the tartlets with powdered sugar just before serving for a touch of elegance. You can also drizzle a bit of melted chocolate over the top or garnish with fresh mint leaves for added color.
2. Optional Toppings: Consider serving your tartlets with a dollop of freshly whipped cream or a scoop of vanilla ice cream. The creamy textures pair beautifully with the rich chocolate and sweet pears.
3. Beverage Pairings: These tartlets complement several beverages. A cup of freshly brewed coffee enhances the flavors of chocolate, while a dessert wine like late harvest Riesling or a robust red wine can elevate the dining experience.
Nutritional Information
When indulging in these Pear & Chocolate Tartlets, it’s essential to be mindful of nutritional content. Each tartlet typically contains:
– Calories: Approximately 250-300 per tartlet
– Total Fat: 15-20g
– Carbohydrates: 30-35g
– Protein: 4g
– Fiber: 2g
While they are a treat best enjoyed in moderation, the goodness of pears adds a nutritional boost, providing vitamins and antioxidants.
Conclusion
Creating Pear & Chocolate Tartlets is a delightful culinary project that results in an impressive dessert worthy of any occasion. The combination of rich chocolate and sweet, tender pears creates a symphony of flavors that will leave your guests craving more.
Don’t hesitate to experiment with variations; consider swapping in different fruits like apples or adding spices such as cinnamon or nutmeg for an autumn twist. The joy of baking these tartlets goes beyond just the final product—it’s about the experience of sharing homemade desserts with loved ones and the smiles that follow.
So gather your ingredients, follow these detailed steps, and enjoy the satisfaction of creating something truly special. Happy baking!


