
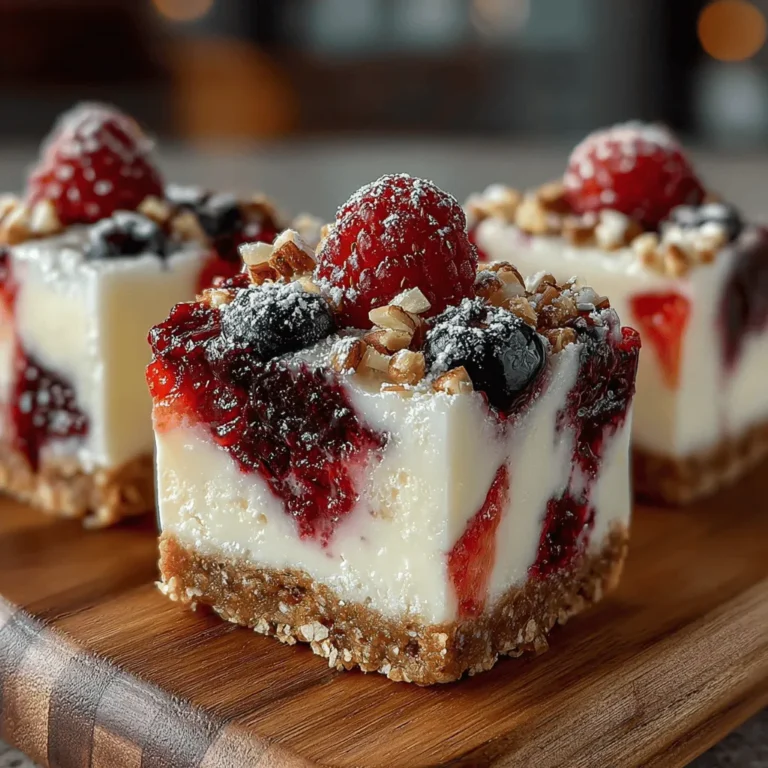
Frozen Yogurt Berry Oat Swirl Squares: A Healthy Frozen Treat
In recent years, frozen yogurt desserts have surged in popularity, captivating health-conscious foodies and dessert lovers alike. As a lighter alternative to traditional ice cream, frozen yogurt offers a creamy, satisfying indulgence without the heaviness often associated with dairy-based treats. Among the myriad of frozen yogurt options available, the Frozen Yogurt Berry Oat Swirl Squares stand out as a delightful, nutritious choice that combines the richness of yogurt with the wholesome goodness of oats and fresh berries.
These squares not only make for a refreshing dessert on a hot day but also serve as a guilt-free snack option any time of the year. With their enticing blend of flavors and textures, they are perfect for satisfying your sweet tooth while providing a boost of essential nutrients. The beauty of this recipe lies in its versatility, allowing you to customize it according to your preferences and dietary needs.
Understanding the Ingredients
To create the perfect Frozen Yogurt Berry Oat Swirl Squares, it’s essential to understand the key ingredients that contribute to both the flavor and nutritional profile of this treat.
Rolled Oats
At the base of this recipe are rolled oats, which serve as a sturdy foundation for the squares. Oats are not only a staple in many health-conscious diets but also packed with nutritional benefits. They are an excellent source of soluble fiber, which can help lower cholesterol levels and regulate blood sugar. Additionally, oats provide a good dose of vitamins and minerals, including manganese, phosphorus, magnesium, and iron.
In this recipe, rolled oats give the Frozen Yogurt Berry Oat Swirl Squares their chewy texture, creating a satisfying contrast to the smooth yogurt and fruity swirls. Their natural nuttiness complements the sweetness of the other ingredients, making them an integral part of this delicious dessert.
Nut Butter
Another essential component of this recipe is nut butter, which adds creaminess and depth of flavor. Options such as almond butter, peanut butter, or cashew butter can be used, each bringing its unique taste and nutritional benefits. Nut butters are rich in healthy fats, protein, and fiber, making them a fantastic addition to any diet. They not only enhance the taste of the frozen yogurt squares but also provide sustained energy, keeping you fuller for longer.
When choosing a nut butter for this recipe, consider opting for natural varieties that contain minimal ingredients—ideally just the nuts themselves and perhaps a pinch of salt. This ensures you are getting the full nutritional benefits without added sugars or unhealthy fats.
Sweeteners
To achieve just the right level of sweetness, this recipe incorporates natural sweeteners such as honey or maple syrup. Both options are preferable over refined sugars, as they offer additional nutrients and a lower glycemic index. Honey, with its unique flavor, provides antioxidants and has potential health benefits, including antibacterial properties. Maple syrup, on the other hand, is rich in minerals like zinc and manganese and adds a delightful caramel-like sweetness to the squares.
When deciding between honey and maple syrup, consider your dietary preferences (for instance, honey is not vegan) and choose the one that best suits your taste. Either way, these natural sweeteners will enhance the overall flavor profile without compromising on health.
Greek Yogurt
Greek yogurt is the star ingredient in this recipe, providing a creamy texture and a tangy flavor that pairs beautifully with the sweetness of the berries and the nuttiness of the oats. Packed with protein and probiotics, Greek yogurt promotes gut health and helps build muscle. It’s a versatile ingredient that can be flavored to your liking, making it easy to customize the squares according to your preferences.
When selecting Greek yogurt, look for varieties that are low in added sugars and high in protein. You can also experiment with flavored yogurts—think vanilla or berry—to further enhance the taste of your Frozen Yogurt Berry Oat Swirl Squares.
Berries
Berries are the vibrant, nutritious component that brings this recipe to life. Whether you choose strawberries, blueberries, raspberries, or a mix of all three, they are loaded with antioxidants, vitamins, and fiber. These tiny powerhouses are known for their health benefits, which include reducing inflammation and supporting heart health.
When it comes to using berries in your Frozen Yogurt Berry Oat Swirl Squares, you have the option of using fresh or frozen. Fresh berries are wonderful when they are in season, providing a burst of flavor and natural sweetness. However, frozen berries can be just as nutritious and are often more convenient, especially in the off-season. Just remember to thaw and drain any excess liquid if you opt for frozen berries to maintain the right consistency in your dessert.
Optional Add-ins
To elevate your Frozen Yogurt Berry Oat Swirl Squares even further, consider adding optional ingredients such as nuts or seeds for an extra crunch. Chopped almonds, walnuts, or pumpkin seeds can provide additional texture and nutritional benefits, including healthy fats, protein, and essential minerals. These add-ins can be mixed into the oat base or sprinkled on top before freezing, allowing you to tailor the squares to your liking.
Step-by-Step Instructions
Now that you have a solid understanding of the ingredients, it’s time to dive into the preparation of your Frozen Yogurt Berry Oat Swirl Squares. Here’s a clear, descriptive guide to help you through the initial steps:
1. Prepare the Base: In a mixing bowl, combine rolled oats with your choice of nut butter. Stir in your selected sweetener until everything is well incorporated. This mixture will form the base layer of your squares.
2. Prepare the Yogurt Mixture: In another bowl, mix Greek yogurt with a splash of vanilla extract and a bit of sweetener, if desired. This will create a creamy filling that complements the oat base beautifully.
3. Layering: Line a square baking dish with parchment paper for easy removal. Press the oat mixture evenly into the bottom of the dish to create a solid base. Then, spread the Greek yogurt mixture over the oats, smoothing it out to cover completely.
4. Add the Berries: If you’re using fresh berries, gently press them into the yogurt layer. If you’re using frozen berries, ensure they are thawed and drained before adding them. Swirl them lightly into the yogurt, creating a beautiful marbled effect.
5. Freeze: Place the dish in the freezer and let it chill for at least 4 hours or until fully set. This step is crucial for achieving the right texture for the squares.
By following these initial steps, you will be on your way to creating a delightful dessert that not only pleases the palate but also nourishes the body. Stay tuned for the next part of the article, where we will explore additional tips for serving and enjoying your Frozen Yogurt Berry Oat Swirl Squares!
Preparing the Oat Base: Mixing and Texture Tips
To create the perfect foundation for your Frozen Yogurt Berry Oat Swirl Squares, the oat base is essential. Start by combining rolled oats, a pinch of salt, and your choice of sweetener, such as maple syrup or honey, in a mixing bowl. For added flavor and nutrition, consider including a scoop of nut butter or coconut oil. This not only enhances taste but also binds the ingredients together for a smoother texture.
When mixing, ensure that the oats are evenly coated with the sweetener and fat. You can use a fork to break up any clumps, promoting a uniform mixture. If the blend seems too dry, add a tablespoon of water or plant-based milk, mixing until you reach a slightly sticky consistency. This will help the oat base hold together once baked.
Lining the Baking Dish: Importance of Parchment Paper
Using parchment paper to line your baking dish is crucial when making these squares. It not only prevents sticking but also allows for easy removal once the squares are frozen. Cut a piece of parchment paper large enough to cover the bottom and sides of your dish, leaving a little overhang on the edges. This overhang will act as handles, making it easier to lift the squares out once they are set.
Ensure the parchment paper is smooth against the dish, as any wrinkles can create uneven edges in your finished product. This small step contributes significantly to the overall presentation and ease of serving.
Crafting the Berry Yogurt Mixture: Proper Folding Techniques
Now, it’s time to create the star of the show: the berry yogurt mixture. Start with your choice of yogurt—Greek yogurt or a plant-based alternative works well. In a mixing bowl, combine the yogurt with your choice of sweetener and a splash of vanilla extract for flavor. For the berry component, mash fresh or frozen berries until smooth, then fold them gently into the yogurt mixture.
When folding, use a spatula to scoop under the mixture and lift it over itself. This gentle technique ensures that the yogurt remains fluffy and light, preventing it from becoming runny. Aim for a marbled effect, keeping some bits of berries intact for texture and color.
Assembling the Squares: Tips for Even Spreading
With both the oat base and berry yogurt mixture prepared, it’s time to assemble your squares. Start by pressing the oat mixture evenly into the bottom of the lined baking dish, creating a solid layer. Use the back of a measuring cup or your hands to compress the oats firmly, ensuring there are no gaps.
Next, pour the berry yogurt mixture over the oat base. To achieve an even spread, use an offset spatula or the back of a spoon, smoothing it out to the edges. Make sure the yogurt layer is distributed uniformly, allowing for consistent flavors in every square.
Swirling Technique: Achieving the Marbled Effect
To create the iconic swirling effect, take a knife or skewer and gently drag it through the yogurt layer. Start at one corner and move in a zigzag pattern across the surface. Be careful not to over-mix; you want to maintain distinct swirls of yogurt and berry rather than a completely blended mixture. This step is key to both the visual appeal and the flavor profile, giving each square a delightful burst of berry flavor.
Freezing Process: Recommended Duration and Tips for Success
Once your squares are assembled and beautifully swirled, it’s time for the freezing process. Place the baking dish in the freezer and let it chill for at least 4-6 hours, or until the mixture is solid. For best results, cover the dish with plastic wrap or foil to prevent freezer burn.
If you’re short on time, you can reduce the freezing period by dividing the square mixture into smaller containers or individual molds. This way, the squares will freeze quicker, allowing you to enjoy your creation sooner.
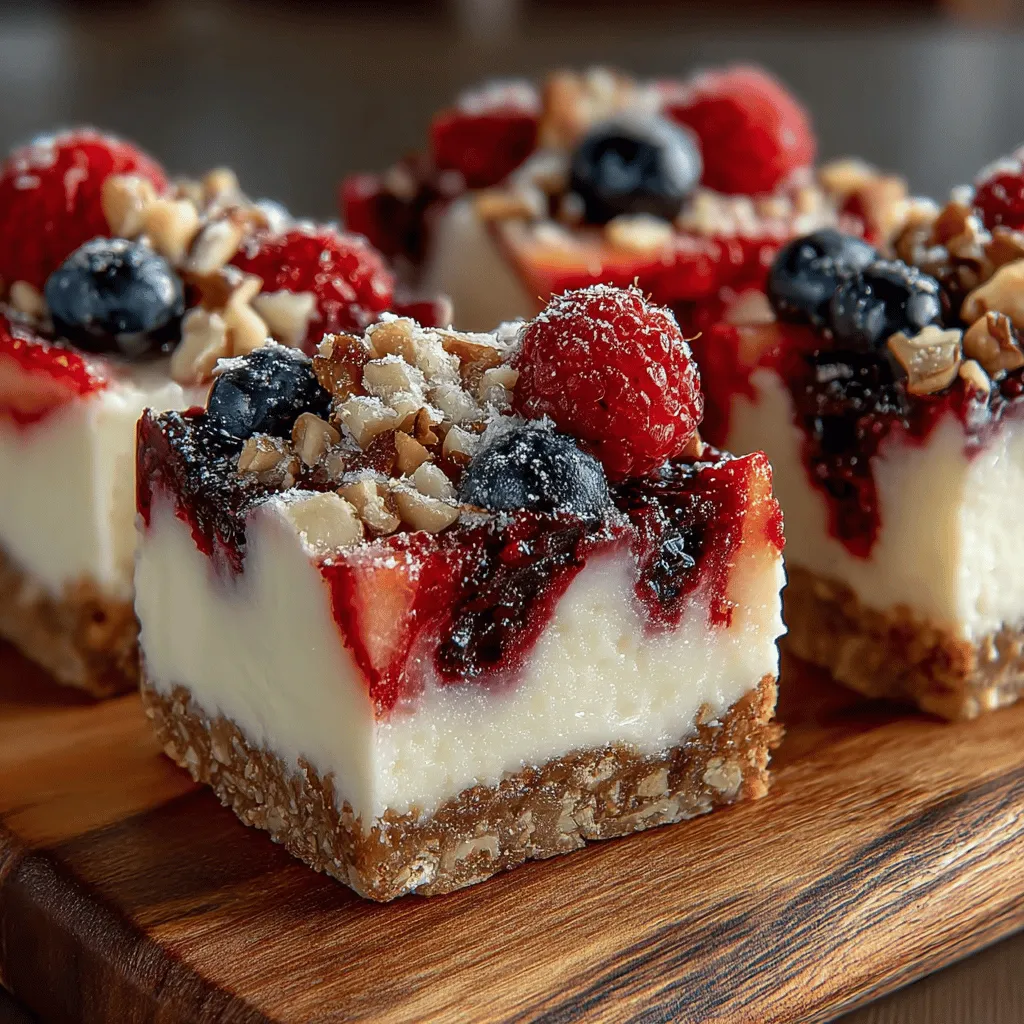
Serving Suggestions: How to Slice and Present
Once the Frozen Yogurt Berry Oat Swirl Squares are fully frozen, it’s time to slice and serve. Remove the baking dish from the freezer and allow it to sit at room temperature for about 5 minutes to soften slightly. This will make cutting easier and help maintain the integrity of the squares.
Using a sharp knife, cut the squares into equal pieces, making sure to wipe the knife clean between cuts to ensure neat edges. For a beautiful presentation, arrange the squares on a serving platter and consider garnishing with additional fresh berries or a drizzle of honey or nut butter.
Nutritional Information
Each square of the Frozen Yogurt Berry Oat Swirl Squares is not only delicious but also packed with nutritional benefits. A standard serving (one square) contains approximately 150 calories, making it a guilt-free indulgence. The oats provide fiber, aiding digestion and promoting satiety, while the berries offer antioxidants and vitamins essential for overall health. Yogurt adds protein, which is vital for muscle repair and maintenance.
Incorporating these squares into your diet can be a delightful way to satisfy sweet cravings while enjoying a healthy treat. They are perfect for afternoon snacks, post-workout recovery, or even as a light dessert option.
Customizing Your Frozen Yogurt Squares
One of the joys of this recipe is its versatility. Here are some ideas for customizing your Frozen Yogurt Berry Oat Swirl Squares to suit your taste preferences:
– Flavor Variations: Experiment with different yogurt flavors, such as coconut, vanilla, or even lemon, to create unique combinations.
– Alternative Fruits: Depending on the season, try swapping out berries for other fruits like peaches, mangoes, or even cherries for a different flavor profile.
– Different Nut Butters: Use almond, cashew, or sunflower seed butter in the oat base for a new twist.
– Swapping Sweeteners: Adjust sweetness according to your dietary needs. Consider using stevia or agave syrup for lower-calorie options.
– Additional Mix-ins: Enhance the flavor and texture by adding mix-ins such as chia seeds, flaxseeds, or shredded coconut.
– Chocolate Chips: For those with a sweet tooth, sprinkle mini chocolate chips into the berry yogurt mixture for an indulgent touch.
– Spices: Add warmth and depth by incorporating spices like cinnamon or nutmeg into the oat mixture or yogurt.
Storage and Serving Suggestions
To keep your Frozen Yogurt Berry Oat Swirl Squares fresh and delicious, store them in an airtight container in the freezer. They can last up to a month, making them an ideal make-ahead treat for busy days. For easy access, consider wrapping individual squares in plastic wrap or parchment paper before placing them in a container.
These squares are perfect for various occasions. Whether you need a quick snack, a light dessert for a gathering, or a healthy meal prep option, they fit perfectly into your meal plans. Get creative with serving ideas: pair them with a dollop of whipped coconut cream, a sprinkle of granola, or serve alongside a refreshing fruit salad for a delightful summer treat.
Conclusion
In summary, the Frozen Yogurt Berry Oat Swirl Squares not only offer a deliciously satisfying dessert but also provide numerous health benefits that fit seamlessly into a balanced diet. With a simple recipe that allows for customization, you have the perfect opportunity to create a treat tailored to your preferences and dietary needs.
We encourage you to try this recipe and make it your own—experiment with flavors, textures, and presentations to find what delights you the most. The joy of creating healthy, homemade desserts is not just in the final product, but in the process of making something that nourishes both your body and spirit. Enjoy your culinary adventure with these delightful squares!
