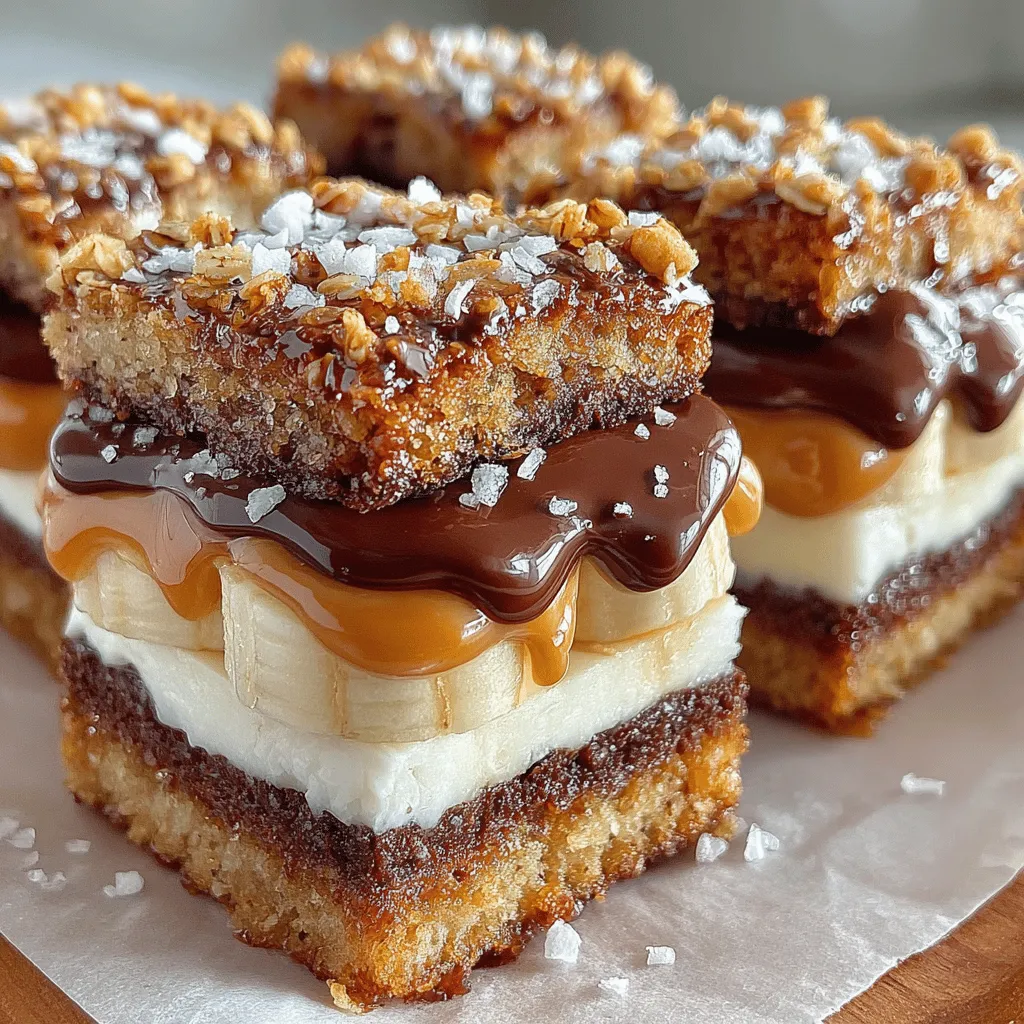
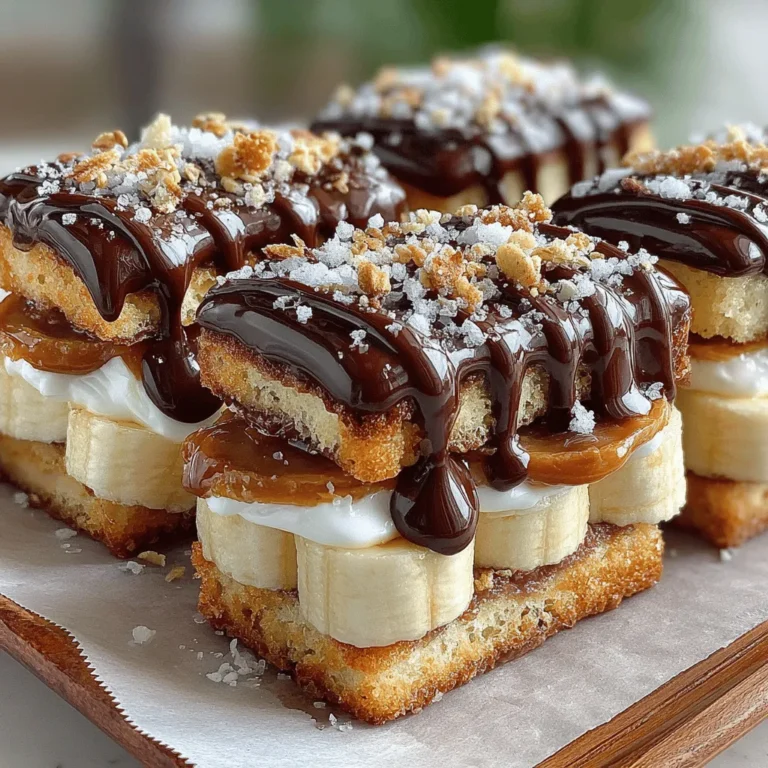
Frozen Banana Chocolate Sandwiches Recipe
As the temperature rises and summer days stretch long, the craving for cool, refreshing treats becomes nearly universal. Among the myriad of frozen delights, few are as simple, nutritious, and satisfying as frozen banana chocolate sandwiches. This delightful snack combines the natural sweetness of ripe bananas with the creamy richness of nut butter, all enrobed in luscious chocolate. It’s the perfect way to indulge your sweet tooth while keeping things healthy—a win-win for anyone looking to beat the heat.
The Appeal of Frozen Treats
Frozen treats are synonymous with summer, evoking nostalgic memories of ice cream trucks and backyard barbecues. They provide a welcome respite from the heat and a simple way to enjoy a sweet indulgence. However, many traditional frozen desserts are laden with added sugars and artificial ingredients, making them less appealing for health-conscious snackers. Enter frozen banana chocolate sandwiches—an easy, homemade alternative that offers the joy of a frozen treat without compromising on health.
This recipe is not just for adults; it’s perfect for families too. Making these sandwiches becomes a fun activity where both kids and parents can get involved, either by choosing their favorite nut butter or experimenting with different toppings. The simplicity of the recipe ensures that even novice cooks can create a delicious snack that everyone will love.
Understanding the Ingredients
Ripe Bananas
The foundation of this recipe lies in ripe bananas. Choosing the right level of ripeness is crucial, as it directly impacts the flavor and sweetness of your final product. Ideally, you want bananas that are speckled with brown spots, indicating they are perfectly ripe. These bananas are softer, sweeter, and easier to mash, providing a rich, flavorful base for your sandwich.
Beyond their taste, bananas are incredibly nutritious. They are rich in potassium, which is essential for heart health and maintaining proper muscle function. Additionally, bananas provide a good source of dietary fiber, aiding in digestion and helping to keep you full. With these health benefits, bananas are not only a delicious treat but also a smart choice for a quick snack.
Nut Butter
The next layer of flavor comes from nut butter, which adds creaminess and a wealth of nutrients. You can choose from a variety of nut butters, such as peanut, almond, or cashew. Each type brings its unique flavor and health benefits. For instance, peanut butter is high in protein and healthy fats, while almond butter is packed with vitamin E and magnesium. Cashew butter, on the other hand, is creamy and slightly sweet, making it a delightful option for this recipe.
Customization is key when it comes to nut butter. For those with allergies, there are plenty of alternative spreads available, including sunflower seed butter or soy nut butter. Additionally, if you’re following a vegan diet, ensure that the nut butter you choose is free from any animal-derived ingredients.
Chocolate Choices
Chocolate is the pièce de résistance in this recipe. The type of chocolate you use can significantly alter the flavor profile of your sandwiches. Dark chocolate, for example, is rich in antioxidants and has less sugar than its milk chocolate counterpart, making it a healthier option. It also boasts a more intense flavor that pairs beautifully with the sweetness of bananas. Milk chocolate, while sweeter and creamier, may not offer the same health benefits but provides a nostalgic taste that many love.
When selecting chocolate for melting and coating, it’s essential to choose high-quality chocolate. Look for chocolate with a high cocoa content and minimal additives to ensure a smooth melting process and a rich flavor.
Coconut Oil
Another ingredient that plays a crucial role in this recipe is coconut oil. When melted, coconut oil creates a silky texture that helps chocolate coat the banana sandwiches evenly. It also contributes a slight hint of coconut flavor, complementing the other ingredients beautifully. Additionally, coconut oil boasts health benefits such as supporting heart health and providing quick energy due to its medium-chain triglycerides (MCTs).
Sea Salt and Optional Toppings
To enhance the flavor of your frozen banana chocolate sandwiches, don’t overlook the importance of sea salt. A sprinkle of sea salt on top of the chocolate coating can elevate the sweetness of the banana and chocolate, creating a delightful contrast.
Moreover, feel free to get creative with toppings. Crunchy options like granola, chopped nuts, or even shredded coconut can add texture and additional flavor to your sandwiches. These toppings not only enhance the visual appeal but also contribute extra nutrients, making your treat even more satisfying.
Step-by-Step Instructions for Making Frozen Banana Chocolate Sandwiches
Preparing the Bananas
To begin your frozen banana chocolate sandwiches, you’ll want to start with the bananas. Peel the bananas and place them on a cutting board. Using a sharp knife, slice the bananas into even rounds, about half an inch thick. The uniformity of the slices is important for stability; uneven slices may lead to sandwiches that slide apart easily.
Once sliced, you can lay the banana rounds on a parchment-lined baking sheet. This will prevent them from sticking to the surface and make for easier handling later on.
Spreading the Nut Butter
Next, it’s time to add the nut butter. Take a small amount of your chosen nut butter and place it on one banana slice. Using a small spatula or the back of a spoon, spread the nut butter evenly across the surface, ensuring you reach the edges to hold the sandwich together. Be gentle to avoid tearing the banana slice.
Once you have spread the nut butter, take another banana slice and place it on top, creating a sandwich. Repeat this process until all the banana slices and nut butter are used up. Remember, you can mix and match nut butter flavors or even layer different types for added depth of flavor.
Freezing the Sandwiches
After assembling your banana sandwiches, it’s time to freeze them. Place the baking sheet in the freezer and allow the sandwiches to freeze for at least 1-2 hours, or until firm. Freezing is essential for achieving the right texture and makes the sandwiches easier to dip in chocolate later on.
Once the sandwiches are fully frozen, you can proceed to the next step of coating them in chocolate, which will turn them into the delectable frozen treats you’ve been anticipating.
With this foundation laid, you’re well on your way to creating frozen banana chocolate sandwiches that are not only delicious but also nutritious and fun for the whole family. Stay tuned for the next part, where we will cover the steps for melting the chocolate, coating the sandwiches, and adding those delightful finishing touches!

Freezing Time Considerations
When preparing your Frozen Banana Chocolate Sandwiches, it’s essential to consider that freezing times can vary based on the efficiency of your freezer. Generally, the bananas will need a minimum of 2-3 hours to freeze adequately, allowing them to firm up before coating them in chocolate. However, if your freezer is less efficient or if you live in a warmer climate, you may need to extend this time to ensure that the bananas are completely frozen. To check if they are ready, simply press on a banana slice; it should be firm and not easily dented.
Melting the Chocolate
Methods for Melting Chocolate
Melting chocolate is a crucial step in this recipe, as it forms the smooth and delicious coating that envelops the banana sandwiches. You have two primary methods to choose from: the saucepan method and the microwave method.
Saucepan Method
1. Chop the Chocolate: Start by chopping your chocolate into small, uniform pieces. This helps it melt evenly.
2. Double Boiler Setup: Place a heat-safe bowl over a saucepan filled with simmering water to create a double boiler. Ensure the bowl does not touch the water.
3. Melt the Chocolate: Add the chopped chocolate to the bowl and stir gently until it’s fully melted and smooth. Be mindful not to let water splash into the chocolate, as this can cause it to seize.
Microwave Method
1. Chop the Chocolate: Just like with the saucepan method, chop the chocolate into small pieces.
2. Microwave in Intervals: Place the chocolate in a microwave-safe bowl and heat it in 30-second intervals, stirring in between. This prevents overheating, which can lead to burning or seizing.
Achieving the Perfect Consistency
For dipping, your melted chocolate should have a smooth and glossy consistency. If it appears too thick, you can add a small amount of coconut oil or vegetable shortening to thin it out, allowing for easier dipping and better coverage.
Dipping the Sandwiches
Ensuring Even Coating
Once your chocolate has reached the perfect consistency, it’s time to dip the banana sandwiches. Start by taking one sandwich at a time and holding it by the edges. Submerge it into the melted chocolate, ensuring that it is fully coated. A helpful tip is to tilt the bowl slightly to allow for a deeper dip.
Shaking Off Excess Chocolate
After dipping, gently shake the sandwich to remove any excess chocolate. Hold it over the bowl and lightly tap the edges. This avoids a messy finish and helps create a neat coating. If you notice any drips, you can use a spatula or a knife to smooth them out.
Adding Toppings
Timing for Topping Application
To enhance the visual appeal and flavor of your Frozen Banana Chocolate Sandwiches, consider adding toppings. It’s important to do this while the chocolate is still wet; this will ensure that the toppings adhere properly. Sprinkle your chosen toppings immediately after dipping, allowing them to stick effectively.
Creative Topping Combinations
The options for toppings are virtually limitless! Here are a few creative combinations to consider:
– Crunchy Nuts: Chopped almonds, hazelnuts, or peanuts offer a delightful crunch.
– Coconut Flakes: Unsweetened coconut flakes add a tropical twist.
– Sprinkles: Perfect for kids, colorful sprinkles can make your sandwiches festive.
– Crushed Cookies: Use crushed graham crackers, Oreos, or biscotti for a unique texture.
Final Freeze and Serving
Importance of the Final Freeze
After you’ve dipped and decorated your sandwiches, place them on a parchment-lined tray and return them to the freezer for at least another hour. This final freeze is crucial for setting the chocolate, ensuring that it hardens properly and provides a satisfying crunch when bitten into.
Serving Suggestions and Storage Tips
When it comes time to serve your Frozen Banana Chocolate Sandwiches, remove them from the freezer and let them sit for a few minutes to soften slightly. This enhances the flavor and texture, making them easier to bite into.
For storage, keep any leftovers in an airtight container in the freezer. They will maintain their freshness for up to two weeks, but they might not last that long due to how delicious they are!
Nutritional Information and Benefits
Nutritional Breakdown
Each serving of Frozen Banana Chocolate Sandwiches (approximately one sandwich) contains:
– Calories: 120-150 (depending on chocolate type)
– Fat: 5-8g
– Protein: 1-2g
– Sugars: 10-12g
Health Benefits of Ingredients
This treat offers a balanced indulgence, combining the natural sweetness of bananas with the rich flavor of chocolate. Bananas are a great source of potassium and vitamin C, while dark chocolate provides antioxidants and can be beneficial for heart health. By using high-quality chocolate and fresh fruits, you’re not only creating a delicious dessert but also one that offers nutritional benefits.
Variations of the Recipe
Flavor Variations
Feel free to experiment with different fruits or flavorings in your sandwiches. Here are some ideas:
– Strawberries: Swap out bananas for strawberries for a refreshing twist.
– Raspberries: These tart berries can add a burst of flavor when used in place of bananas.
– Peanut Butter: Add a layer of peanut butter between banana slices for a delightful flavor combo.
Dietary Adaptations
This recipe can easily be adapted to suit various dietary needs:
– Gluten-Free: Ensure that any toppings or chocolate you use are gluten-free.
– Dairy-Free: Opt for dairy-free chocolate or dark chocolate that doesn’t contain milk.
– Lower Sugar: Consider using sugar-free chocolate or dark chocolate with a higher cocoa content for a healthier option.
Different Chocolate Coatings
While dark chocolate is the traditional choice, you can also try these alternatives for a different flavor profile:
– White Chocolate: For a sweeter treat, use melted white chocolate.
– Yogurt Coating: Yogurt can be a healthier alternative, providing a creamy texture without the richness of chocolate.
The Joy of Making Frozen Treats
Creating Frozen Banana Chocolate Sandwiches is not just about the delicious outcome; it’s also a fun and engaging activity for families. Involving children in the kitchen fosters creativity and culinary skills. They can help with everything from slicing bananas to dipping them in chocolate, making the experience enjoyable and educational.
Encouraging kids to experiment with toppings or combinations not only sparks their imagination but also builds their confidence in cooking. The joy of enjoying a homemade treat together is priceless.
Conclusion
Frozen Banana Chocolate Sandwiches are a delightful and healthy dessert option that can be tailored to suit a variety of tastes and dietary needs. Their simplicity in preparation makes them an excellent choice for both novice and experienced cooks alike. With endless possibilities for flavor and presentation, these sandwiches are sure to become a favorite in your household.
Now that you have the recipe, it’s time to get creative! Experiment with your toppings, try different fruits, and enjoy the process of making this delicious treat. The best part is sharing the results with family and friends, making every bite a celebration of flavor and joy. Enjoy making your Frozen Banana Chocolate Sandwiches at home!


