
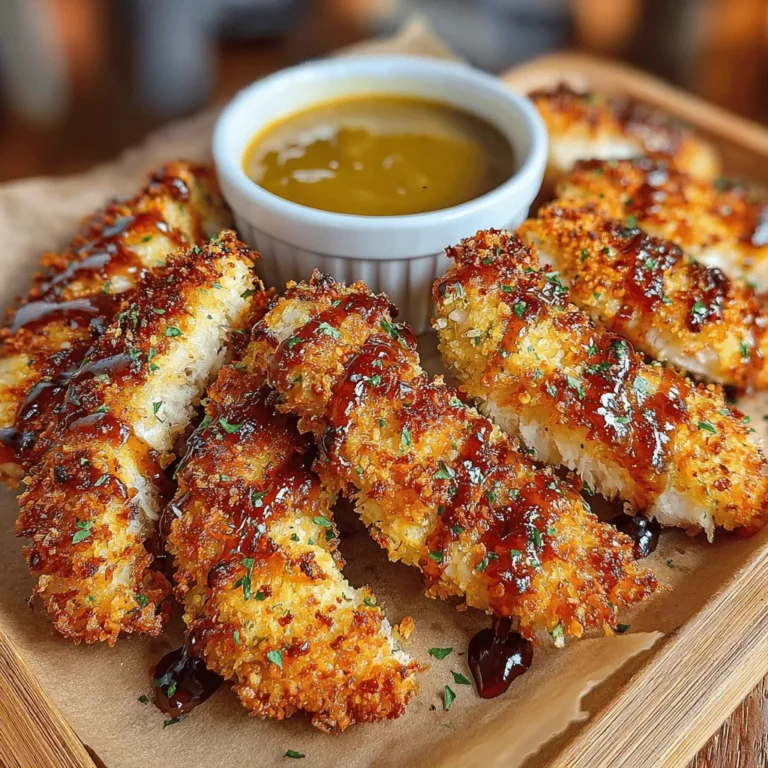
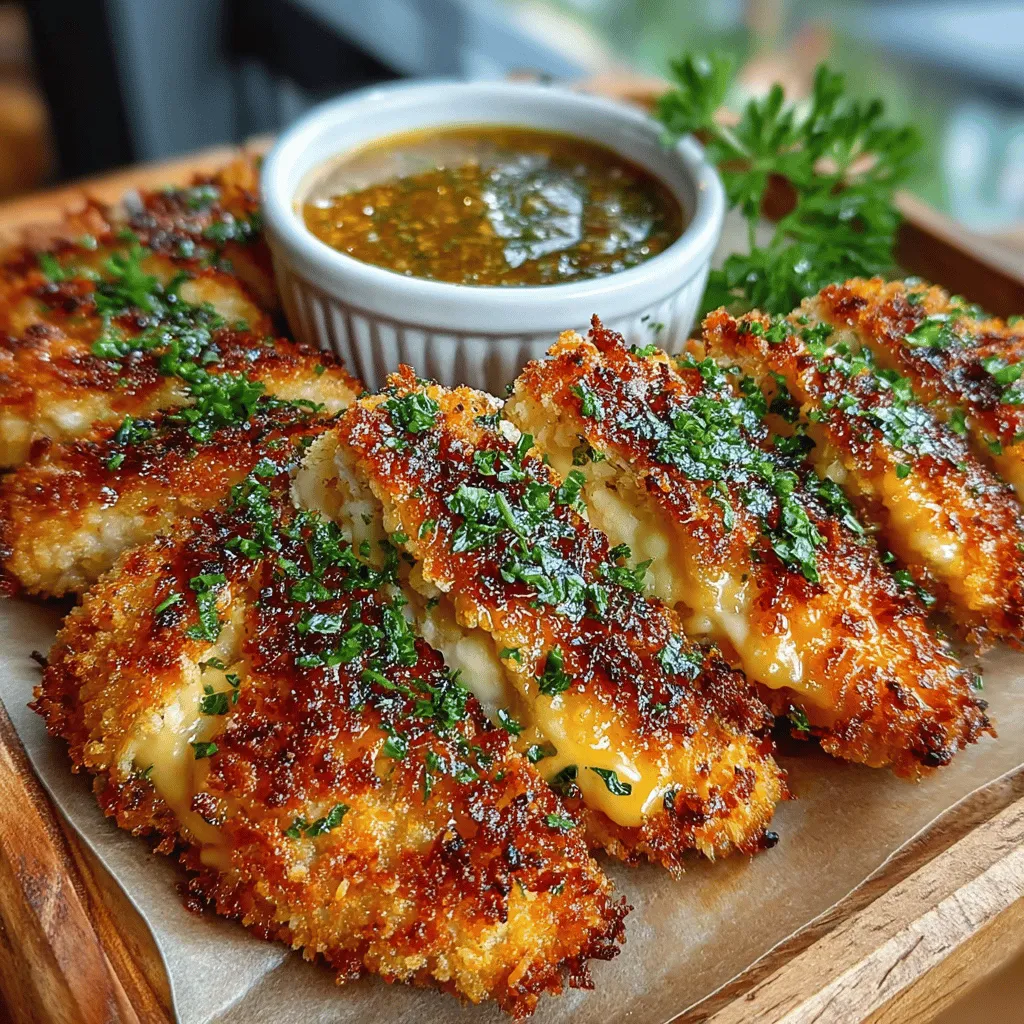
Crispy Baked Chicken Tenders with Sweet Honey Mustard: A Healthier Take on a Classic Favorite
In today’s culinary landscape, crispy baked chicken tenders have emerged as a family favorite, combining the deliciousness of fried chicken with a healthier baking method. These tenders offer a satisfying crunch and tender meat, making them not just a meal, but an experience that delights both kids and adults alike. This article presents a comprehensive recipe for Crispy Baked Chicken Tenders with Sweet Honey Mustard, a dish that tantalizes taste buds while remaining nutritious. With a perfect balance of flavor and texture, these tenders are sure to become a staple in your household.
The Appeal of Baked Chicken Tenders
Understanding the popularity of baked chicken tenders is essential to appreciate their place in modern cuisine. Traditional fried chicken is loved for its crispy exterior and juicy interior, but the health implications of frying can be a deterrent for many home cooks. Baked chicken tenders provide all the flavor with less fat, making them an attractive option for families looking to enjoy their favorite comfort foods without the guilt.
Moreover, baking chicken tenders retains the moisture and tenderness of the meat while allowing for a crispy coating through clever use of breadcrumbs and seasonings. This recipe fits seamlessly into a balanced diet, offering protein and essential nutrients without excessive calories. Families can indulge in this dish knowing that they are making a smart choice for their health while still enjoying a delicious meal.
Ingredient Breakdown for Crispy Baked Chicken Tenders
The success of Crispy Baked Chicken Tenders lies in the quality and combination of its ingredients. Let’s break down the key components that contribute to the dish’s irresistible flavor and texture:
– Boneless, Skinless Chicken Breasts: The foundation of this recipe, boneless, skinless chicken breasts are lean and versatile. Their mild flavor allows them to absorb the seasonings beautifully, while their texture ensures that the tenders cook evenly and remain juicy.
– Breadcrumbs (Panko for Extra Crunch): Panko breadcrumbs are a game-changer in achieving that coveted crispy texture. Unlike traditional breadcrumbs, panko is made from crustless bread, resulting in lighter and airier crumbs that crisp up beautifully when baked. This ensures that each bite of chicken tender has a satisfying crunch without the heaviness that often accompanies fried foods.
– Grated Parmesan Cheese: Adding grated Parmesan cheese to the breadcrumb mixture elevates the flavor profile of the chicken tenders. Not only does it contribute a savory, nutty taste, but it also enhances the crispiness of the coating. The cheese melts slightly during baking, creating a golden-brown crust that is both visually appealing and delicious.
– Essential Spices and Seasonings: The seasoning blend is crucial in bringing the chicken tenders to life. Common spices such as garlic powder, onion powder, paprika, salt, and pepper work together to create a flavorful coating that complements the natural taste of the chicken. Each spice has a specific role—garlic powder adds depth, paprika provides a hint of smokiness, and salt enhances the overall flavor.
By carefully selecting and combining these ingredients, you set the stage for a dish that is not only satisfying but also bursting with flavor. The importance of panko versus regular breadcrumbs cannot be overstated, as their unique texture plays a significant role in the final product. Additionally, the Parmesan cheese adds an extra layer of flavor and acts as a binding agent, helping the breadcrumbs adhere to the chicken.
Step-by-Step Preparation Guide
Now that you are familiar with the ingredients, it’s time to dive into the preparation process. The following steps will guide you through creating these delightful crispy baked chicken tenders, starting from the very beginning.
1. Preheating the Oven: Begin by preheating your oven to 400°F (200°C). This high temperature helps achieve that desirable crispy exterior while keeping the chicken moist inside. While the oven is preheating, you can prepare your baking sheet.
2. Preparing the Baking Sheet: Line a baking sheet with parchment paper or a silicone baking mat. This not only prevents the chicken tenders from sticking but also makes cleanup a breeze. If you have a wire rack, placing it on top of the baking sheet can elevate the chicken tenders, allowing for even airflow and additional crispiness.
3. Preparing the Chicken: While your oven is heating, take the boneless, skinless chicken breasts and slice them into strips. Aim for uniform sizes to ensure even cooking. If your chicken breasts are thick, you might want to pound them slightly to achieve a more consistent thickness—this will help them cook evenly and remain tender.
4. Coating Station Setup: Prepare three shallow bowls for the coating process:
– In the first bowl, add flour mixed with a pinch of salt and pepper. This will serve as the first layer, helping the egg mixture adhere to the chicken.
– The second bowl should contain beaten eggs, which will act as the binder for the breadcrumbs.
– In the third bowl, combine panko breadcrumbs, grated Parmesan cheese, and your chosen spices. Mix well to ensure even distribution.
5. Coating the Tenders: Take each chicken strip and first dredge it in the flour mixture, shaking off any excess. Next, dip it into the beaten eggs, allowing any excess to drip off. Finally, coat the chicken in the panko and Parmesan mixture, pressing gently to ensure the crumbs stick well. Repeat this process until all chicken strips are coated.
By following these initial steps, you will be well on your way to creating Crispy Baked Chicken Tenders that are not only delicious but also nutritious. The meticulous preparation will ensure that every bite is packed with flavor and crunch, making these tenders the perfect addition to any family meal. In the next part of this article, we will delve into the baking process and how to create a delightful homemade sweet honey mustard dip to accompany your tenders.
Creating the Breading Mixture: Tips for Achieving the Ideal Crunch
The key to achieving that coveted crispy texture for your chicken tenders lies in the breading mixture. Start with a base of seasoned breadcrumbs; panko breadcrumbs are a popular choice due to their light and airy texture, which allows for maximum crunch. To prepare the breading, combine the breadcrumbs with spices such as garlic powder, onion powder, paprika, salt, and pepper. This blend not only enhances the flavor but also adds depth to each bite.
For an extra layer of crunch, consider incorporating a bit of grated Parmesan cheese into the breadcrumb mixture. This addition provides a savory richness that complements the chicken beautifully. Mix the breadcrumbs and seasoning thoroughly, ensuring an even distribution of flavors.
Another tip for achieving the ideal crunch is to toast the breadcrumbs lightly in a dry skillet before using them. This step will enhance their crispness and give your chicken tenders an irresistible golden-brown finish.
Preparing the Chicken: Techniques for Coating
Once you have your breading mixture ready, it’s time to focus on the chicken. For this recipe, boneless, skinless chicken breasts are the best choice. Begin by cutting the chicken into even strips, approximately 1 inch wide. This uniformity ensures that the chicken cooks evenly.
To help the breading adhere better, create a three-station breading setup: one for flour, one for beaten eggs, and one for the breadcrumb mixture. First, dredge each chicken strip in all-purpose flour, shaking off any excess. This step helps the egg wash stick to the chicken. Next, dip the floured chicken into the beaten eggs, ensuring it is fully coated. Finally, roll the chicken strip in the breadcrumb mixture, pressing gently to ensure the breadcrumbs adhere well to the surface.
For an added crunch, you can double dip the chicken: after the first coating, dip it back into the egg and then into the breadcrumbs again. This technique builds a thicker crust that will become incredibly crispy when baked.
Arranging and Baking: Achieving Even Cooking and Browning
With the chicken tenders coated and ready to go, it’s time for the baking stage. Preheat your oven to 400°F (200°C) to ensure a hot cooking environment that promotes crispiness. Line a baking sheet with parchment paper or aluminum foil to prevent sticking and make cleanup easier.
Arrange the coated chicken tenders on the baking sheet, ensuring they are spaced apart. This spacing is crucial because it allows for even airflow around the chicken, leading to uniform cooking and browning. If the chicken strips are too close together, they may steam rather than bake, resulting in soggy tenders.
For optimal results, spray the tops of the chicken tenders lightly with cooking spray or drizzle with a bit of olive oil. This step adds moisture while promoting browning and crisping. Bake the chicken tenders for about 20-25 minutes, flipping them halfway through the cooking time to ensure they brown evenly on both sides. The internal temperature of the chicken should reach 165°F (74°C) for safe consumption.
Crafting the Perfect Honey Mustard Dip
Explaining the Components of the Honey Mustard Sauce
No chicken tender is complete without a delicious dipping sauce, and the sweet honey mustard dip is the perfect accompaniment. This sauce balances sweetness and tanginess, enhancing the flavor of the crispy chicken. The main components of the dip are honey, Dijon mustard, and mayonnaise.
Honey provides natural sweetness and a sticky texture, while Dijon mustard adds a tangy kick that cuts through the richness of the chicken. Mayonnaise gives the sauce a creamy consistency, making it smooth and luscious.
Importance of Balance Between Sweetness and Tanginess
Finding the right balance between sweetness and tanginess is key to a successful honey mustard dip. You can adjust the ratio of honey to mustard according to your taste preferences. If you prefer a sweeter dip, increase the honey; for a tangier flavor, add more mustard.
Additionally, consider adding a splash of apple cider vinegar or lemon juice for an extra tangy punch and depth of flavor. A pinch of garlic powder or a dash of hot sauce can also elevate your dip, providing a hint of spice that pairs beautifully with the chicken tenders.
Step-by-Step Instructions for Making the Dip
To make the honey mustard dip, follow these simple steps:
1. In a small bowl, combine 1/2 cup of mayonnaise, 1/4 cup of Dijon mustard, and 1/4 cup of honey.
2. Whisk the ingredients together until smooth and well blended.
3. Taste and adjust the sweetness or tanginess by adding more honey or mustard as desired.
4. If desired, stir in a teaspoon of apple cider vinegar for an additional layer of flavor.
5. Refrigerate the dip for at least 30 minutes to allow the flavors to meld together.
Variations You Might Consider for Customization
Feel free to customize your honey mustard dip to suit your palate. For a spicy kick, add a tablespoon of sriracha or your favorite hot sauce. If you’re a fan of herbs, consider mixing in fresh chopped herbs like dill or parsley for added freshness. You could also experiment with different mustard varieties, such as whole grain or spicy brown mustard, to create unique flavor profiles.
The Cooking Process: Achieving the Ideal Crispiness
Exploring Baking Techniques for Achieving a Crispy Finish
Achieving the ideal crispiness when baking chicken tenders requires attention to both oven temperature and cooking times. A hot oven is essential for creating a crisp exterior while keeping the chicken tender and juicy inside. Baking at 400°F (200°C) allows the breading to brown nicely without overcooking the chicken.
The Significance of Oven Temperature and Cooking Times
Monitoring cooking times is equally important. Depending on the thickness of your chicken strips, cooking may vary slightly. Generally, chicken tenders should bake for 20-25 minutes, but always check for doneness using a meat thermometer. Once the internal temperature hits 165°F (74°C), your chicken is safe and ready to eat.
Why Flipping Chicken Tenders Halfway Through Can Enhance Texture
Flipping the chicken tenders halfway through the baking process is crucial for achieving an even texture. This step ensures that both sides of the chicken get exposure to the hot air in the oven, allowing them to crisp up nicely. If you skip this step, the bottom side may become soggy while the top browns.
Nutritional Information and Serving Suggestions
Providing a Breakdown of Nutritional Content Per Serving
When it comes to enjoying Crispy Baked Chicken Tenders with Sweet Honey Mustard, you can savor them without feeling guilty. Here’s a breakdown of the nutritional content per serving (based on a serving size of 4 tenders):
– Calories: Approximately 300
– Protein: 28 grams
– Fat: 15 grams
– Carbohydrates: 20 grams
This dish is a great source of protein, making it a satisfying option for both adults and children.
Discussing Portion Sizes and How to Serve
For serving, aim for 4-6 chicken tenders per person, depending on appetite and the rest of the meal. These tenders pair wonderfully with a variety of sides, making them versatile for different dining occasions.
Pairing Suggestions: Sides That Complement Chicken Tenders
Consider serving your chicken tenders with classic sides such as:
– French Fries or Sweet Potato Fries: The ultimate comfort food pairing.
– Coleslaw: A refreshing crunch that balances the meal.
– Roasted Vegetables: For a healthier option, roasted broccoli or carrots provide color and nutrition.
– Macaroni and Cheese: A beloved favorite that kids will enjoy.
The Versatility of Chicken Tenders for Different Meals
Crispy Baked Chicken Tenders are not just for dinner. They can be served as a delightful lunch option, added to salads, or used in wraps for a quick meal on the go. Their versatility makes them a great choice for family gatherings, game days, or even as a satisfying snack.
Conclusion
Crispy Baked Chicken Tenders with Sweet Honey Mustard is not just a meal; it’s an experience that brings families together around the dinner table. With its easy preparation and delightful flavor, this recipe is perfect for weeknight dinners or special occasions. The combination of tender chicken with a crispy exterior and a sweet, tangy dip makes for an irresistible dish that everyone will love. Enjoy the satisfaction of making a delicious meal that is both simple and wholesome, delighting your taste buds and nourishing your body. Embrace this recipe, share it with loved ones, and watch it become a cherished favorite in your household.
