
Frozen Yogurt Apple Pie Sandwich Bars: A Refreshing Delight for Warm Days
As the temperatures rise and sunny days beckon, the appeal of frozen desserts becomes undeniable. Whether it’s a hot summer afternoon or a celebratory gathering, nothing beats the satisfaction of a cool treat. While traditional ice cream certainly has its charm, many seek healthier alternatives that still provide the indulgent experience of a sweet, frozen dessert. Enter the Frozen Yogurt Apple Pie Sandwich Bars—a delicious and nutritious option that combines the comforting flavors of apple pie with the creamy texture of yogurt.
These bars are not just a treat for the taste buds; they are a delightful way to enjoy a classic dessert with a modern twist. By layering creamy yogurt with a spiced apple filling and a crunchy graham cracker crust, this recipe creates a harmonious blend of flavors and textures that will satisfy both dessert lovers and health-conscious eaters alike.
The Appeal of Frozen Yogurt Desserts
Frozen yogurt has surged in popularity in recent years, and for good reason. Unlike traditional ice cream, which can be high in calories and fat, frozen yogurt offers a lighter alternative that often packs a nutritional punch. One of the standout features of yogurt is its probiotic content, which supports gut health and enhances digestion. Additionally, frozen yogurt typically contains less sugar and fewer calories compared to its ice cream counterpart, making it a guilt-free indulgence.
For families and health-conscious individuals, homemade frozen treats like Frozen Yogurt Apple Pie Sandwich Bars are especially appealing. They allow you to control the ingredients, ensuring that every bite is crafted with care and health in mind. Moreover, making these bars at home means you can customize flavors and sweetness levels to suit your preferences, creating a personalized dessert experience that store-bought options simply cannot match.
Breaking Down the Recipe
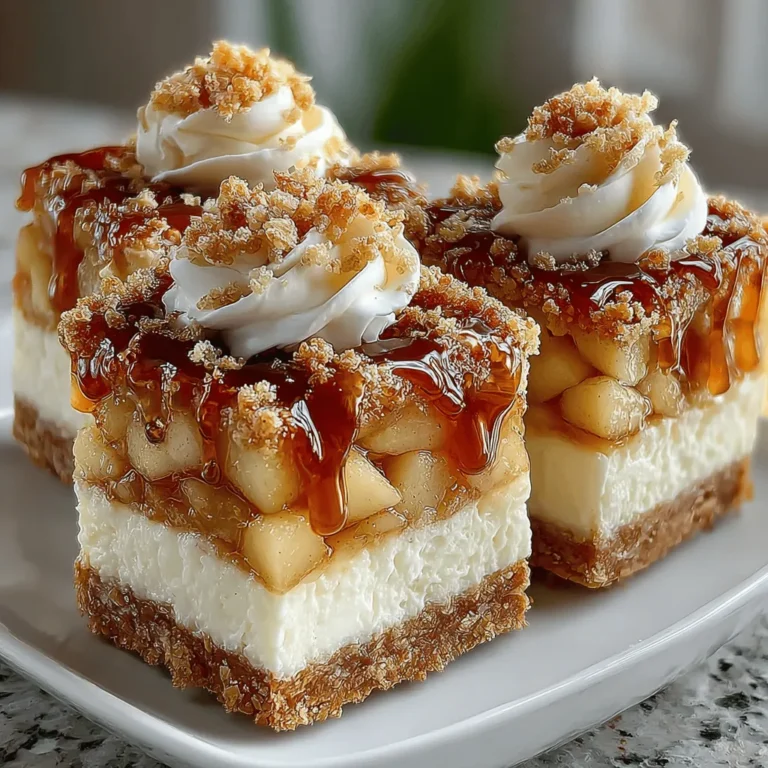
The structure of the Frozen Yogurt Apple Pie Sandwich Bars is as enticing as its flavors. The recipe is composed of three distinct layers that come together to create a satisfying treat.
1. Apple Layer: The first layer features a warm, spiced apple mixture reminiscent of classic apple pie filling. This layer is not only flavorful but also adds a comforting element to the bars.
2. Yogurt Layer: The second layer consists of creamy yogurt, which balances the sweetness of the apples with its tangy flavor. This layer provides a refreshing contrast, making each bite a delightful experience.
3. Graham Cracker Crust: The final layer is a crunchy graham cracker crust that adds texture and a hint of sweetness. This base holds the entire dessert together and provides a satisfying crunch that complements the soft layers above.
Each layer plays a crucial role in the overall flavor and texture of the bars, creating a delightful combination that captures the essence of both apple pie and frozen yogurt.
Ingredients Overview
To make these delicious Frozen Yogurt Apple Pie Sandwich Bars, you’ll need a handful of carefully selected ingredients, each contributing to the final product’s taste and texture:
– Apples: Choosing the right apple variety is key to achieving the perfect flavor and texture in the apple layer. Granny Smith apples bring a tartness that balances the sweetness of the dessert, while Honeycrisp apples offer a sweeter, crisper bite. Depending on your preference, you can mix and match these varieties to create a well-rounded flavor profile.
– Lemon Juice: Fresh lemon juice is not just a flavor enhancer but also plays a vital role in preventing the apples from browning. Its acidity brightens the overall flavor of the apple layer, ensuring that each bite is fresh and vibrant.
– Spices and Sweeteners: A dash of cinnamon and a sprinkle of brown sugar elevate the apple mixture, infusing it with the warm, comforting flavors associated with apple pie. These ingredients not only enhance the taste but also complement the creaminess of the yogurt layer.
– Greek Yogurt: The star of the dessert, Greek yogurt, provides a creamy texture and a boost of protein. Using plain or vanilla-flavored yogurt allows you to control the sweetness and flavor intensity, making it a versatile ingredient.
– Crust Components: The graham cracker crust is the foundation of the bars, providing a crunchy contrast to the soft apple and yogurt layers. You can opt for crushed graham crackers combined with melted coconut oil for a dairy-free option, or traditional butter for a classic flavor.
Step-by-Step Instructions for Making Frozen Yogurt Apple Pie Sandwich Bars
Now that we’ve covered the ingredients and their roles, let’s dive into the initial steps of creating these delightful bars.
1. Preparation of the Apple Mixture: Start by peeling and dicing your chosen apples. In a medium saucepan, combine the diced apples with lemon juice, cinnamon, and brown sugar. Cook over medium heat until the apples soften and the mixture becomes fragrant, stirring occasionally. This process should take about 5-7 minutes. Allow the apple mixture to cool while you prepare the yogurt layer.
2. Preparing the Yogurt Layer: In a mixing bowl, combine Greek yogurt with a touch of honey or maple syrup, depending on your sweetness preference. If you’re using plain yogurt, a splash of vanilla extract can enhance the flavor. Mix until smooth and creamy, ensuring that there are no lumps.
3. Creating the Crust: In a separate bowl, combine graham cracker crumbs with melted coconut oil or butter. Mix until the crumbs are evenly coated and resemble wet sand. Press this mixture firmly into the bottom of a lined baking dish, creating an even layer that will hold the bars together.
With the apple mixture cooling, the yogurt layer mixed, and the crust prepared, you’re ready to assemble your Frozen Yogurt Apple Pie Sandwich Bars. Stay tuned for the next part, where we’ll guide you through the layering process and how to freeze these delicious bars to perfection.
Creating delicious Frozen Yogurt Apple Pie Sandwich Bars requires careful attention to each layer, particularly the apple filling, yogurt mixture, and crust. This section will guide you step-by-step to ensure your dessert turns out perfectly.
Cooking the Apples to Perfection
The first step in crafting your Frozen Yogurt Apple Pie Sandwich Bars is preparing the apple filling. The right consistency and flavor are crucial for achieving a delightful balance in your dessert.
Importance of Cooking Apples to the Right Consistency
Start by selecting the right variety of apples. Tart apples like Granny Smith or Honeycrisp work wonderfully due to their firmness and flavor profile. When cooking apples, aim for a soft texture without turning them into applesauce.
1. Peel, Core, and Dice: Begin by peeling, coring, and dicing your apples into small cubes. This allows for even cooking and easier layering in the bars.
2. Cooking Method: In a medium saucepan over medium heat, add the diced apples along with a splash of water. Cook for about 5-7 minutes until the apples begin to soften but are still slightly firm.
3. Flavoring with Spices: For added depth, sprinkle in spices such as cinnamon and nutmeg. A tablespoon of brown sugar can enhance sweetness while maintaining a hint of tartness. Stir the mixture well and let it cook for another 3-4 minutes until fragrant. Aim for a balance where the tartness of the apples shines through, complemented by the warmth of the spices.
Tips for Ensuring a Well-Balanced Apple Layer
– Taste Test: Before removing the apple mixture from the heat, taste it to ensure the sweetness and tartness are balanced. Adjust by adding more sugar or a splash of lemon juice if necessary.
– Cool Before Layering: Allow the apple mixture to cool to room temperature before layering it with the yogurt. This prevents the yogurt from melting prematurely and ensures distinct layers in your bars.
Creating the Yogurt Layer
The yogurt layer is equally important, as it acts as a creamy counterpart to the spiced apples.
Suggestions for Adjusting Sweetness and Flavor Profile
1. Choose Your Yogurt: Use Greek yogurt for a thicker, creamier texture. You can opt for plain or flavored yogurt depending on your preference. Vanilla-flavored yogurt works particularly well for this recipe.
2. Sweeten to Taste: Mix in honey, maple syrup, or agave nectar to sweeten the yogurt layer. Start with a tablespoon and adjust based on your taste preferences. For a tangier flavor, consider adding lemon zest or a splash of vanilla extract.
3. Mixing Method: In a bowl, combine the yogurt with your chosen sweetener and any additional flavorings. Whisk until smooth and creamy.
Preparing the Crust
The crust serves as the foundation of your sandwich bars, holding the layers together.
Techniques for Pressing the Crust Evenly
1. Choose Your Base: You can use graham cracker crumbs, almond flour, or a combination of oats and nuts for a gluten-free option.
2. Combine Ingredients: In a mixing bowl, combine your crust ingredients with melted butter until they resemble wet sand. This will ensure the crust holds together when frozen.
3. Pressing the Crust: Line a 9×9-inch baking dish with parchment paper for easy removal. Pour the crust mixture into the dish and use the back of a measuring cup or your hands to press it evenly across the bottom. Aim for a compact layer to prevent crumbling.
Assembling the Layers
Once your apple filling, yogurt, and crust are prepared, it’s time to assemble your bars.
Visual Cues for Layering
1. First Layer – Crust: Start with the pressed crust as the base. Make sure it is even and covers the entire bottom of the pan.
2. Second Layer – Yogurt: Spoon the yogurt mixture over the crust, spreading it evenly with a spatula. The yogurt layer should be thick enough to provide a good contrast to the apples.
3. Third Layer – Apples: Next, layer the cooled apple mixture over the yogurt. Spread it evenly, ensuring it covers the yogurt completely.
4. Final Layer – Yogurt: For a finished look, consider adding a final thin layer of yogurt on top of the apples. This will create a beautiful presentation when sliced.
Freezing Instructions
To achieve the perfect texture and flavor for your Frozen Yogurt Apple Pie Sandwich Bars, proper freezing is essential.
Importance of Freezing Time
– Freeze Duration: Place the assembled bars in the freezer for at least 4-6 hours, or until completely firm. This allows the layers to set and meld together, resulting in a cohesive dessert.
– Texture Impact: The freezing time directly affects the bars’ texture; shorter freezing may lead to softer bars, while over-freezing can make them hard. Check after 4 hours for a firm yet creamy consistency.
Serving Suggestions
As you prepare to serve your Frozen Yogurt Apple Pie Sandwich Bars, consider adding some garnishes and beverage pairings.
Creative Garnishing Ideas
1. Crushed Nuts or Granola: Sprinkle crushed walnuts, almonds, or granola on top of the bars before serving for added crunch and flavor.
2. Drizzle of Honey: A light drizzle of honey or maple syrup can enhance the presentation and flavor, making the dessert even more appealing.
Beverage Pairing Suggestions
Pair these bars with a refreshing beverage for a complete dessert experience. Consider serving with:
– Herbal Tea: A warm cup of cinnamon or chamomile tea complements the flavors of the apple pie.
– Sparkling Water: Add a slice of lemon or lime for a refreshing contrast to the creamy bars.
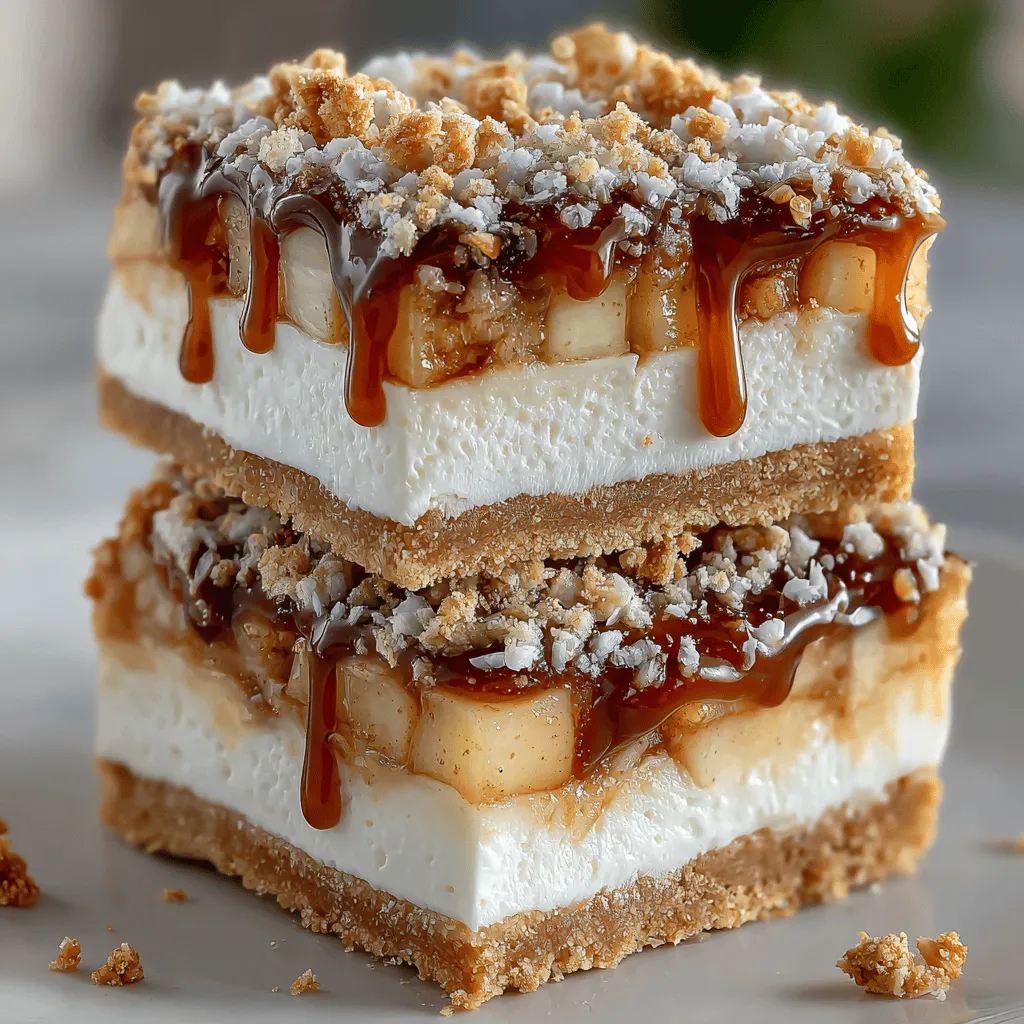
Description of Texture and Taste
When you take a bite of these Frozen Yogurt Apple Pie Sandwich Bars, you’ll experience a delightful combination of creamy yogurt, sweet-spiced apples, and a crunchy crust. The contrast of textures and flavors—tartness from the apples, creaminess from the yogurt, and the crunch of the crust—creates a satisfying homemade treat that is both indulgent and refreshing.
Storage and Shelf Life
To enjoy your Frozen Yogurt Apple Pie Sandwich Bars for longer, proper storage is key.
Best Practices for Storing
1. Wrap and Store: Once fully frozen, cut the bars into squares and wrap each piece in plastic wrap or parchment paper. Place them in an airtight container to prevent freezer burn.
2. Labeling: Label the container with the date, as this helps you keep track of freshness.
Shelf Life and Quality Indicators
– Freezer Duration: These bars can be stored in the freezer for up to 2 months. After that, they may lose flavor and texture quality.
– Indicators of Quality: If you notice ice crystals forming or an off smell upon unwrapping, it’s best to discard them for safety.
Conclusion
Making Frozen Yogurt Apple Pie Sandwich Bars is a rewarding experience that combines delightful flavors and textures. From the spiced apple layer to the creamy yogurt and crunchy crust, each bite offers a taste of homemade goodness that is both enjoyable and healthier than many store-bought desserts.
We encourage you to try this recipe and share it with your family and friends. Don’t hesitate to experiment with different flavors and variations—whether you add berries, other spices, or even a chocolate layer, the possibilities are endless. Enjoy the joy of creating healthier dessert options and savor the delight of homemade treats!
