
Hearty Chicken & Mushroom Pot Pie Recipe
Introduction
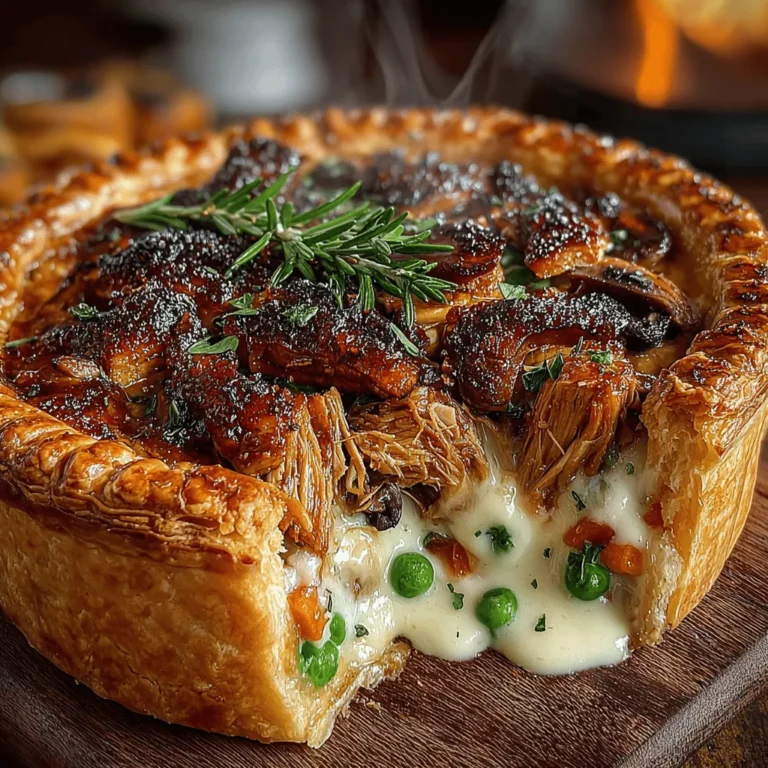
When it comes to comfort food, few dishes evoke feelings of warmth and nostalgia quite like a steaming pot pie. The flaky, golden crust encasing a rich and savory filling is a quintessential symbol of home cooking, bringing to mind cozy family dinners and chilly evenings spent with loved ones. Among the many variations of pot pies, the Hearty Chicken & Mushroom Pot Pie stands out as a particularly inviting choice, perfectly balancing the tender, juicy chicken with the earthy, robust flavor of mushrooms. This dish not only satisfies hunger but also warms the soul, making it an ideal centerpiece for family gatherings or a comforting option for a night in.
The Allure of Hearty Chicken & Mushroom Pot Pie
The origins of pot pie can be traced back to ancient civilizations, where meats were often encased in pastry to preserve them during transport and cooking. Over the centuries, this humble dish has evolved, finding its way into various cuisines around the world. Today, pot pies are celebrated in many cultures, each adding its unique twist to the classic concept.
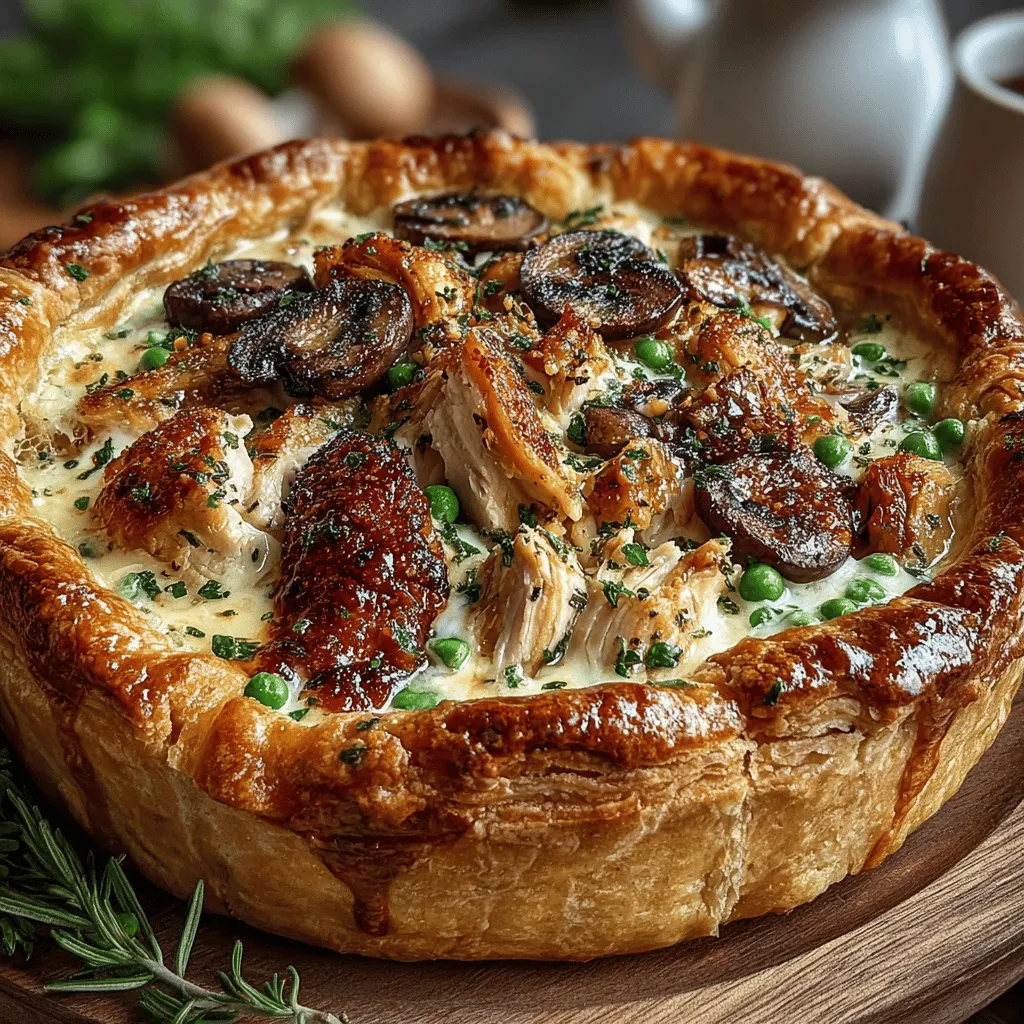
The Hearty Chicken & Mushroom Pot Pie, in particular, has gained immense popularity due to its rich flavors and heartiness. Chicken, a staple protein in many diets, combines beautifully with mushrooms, which add depth and umami to the dish. Together, they create a filling that is not only delicious but also nutritious. Chicken is packed with protein, essential for muscle repair and overall health, while mushrooms are low in calories but rich in vitamins, minerals, and antioxidants. The addition of vegetables such as carrots and peas not only enhances the nutritional value but also adds vibrant colors and a touch of sweetness.
The warm, comforting flavors of this pot pie make it a beloved choice for any occasion. The combination of savory chicken and mushrooms in a creamy sauce, enveloped by a flaky crust, creates a delightful experience for the palate. Each bite is a reminder of home, making it a perfect dish for cold winter nights or festive family gatherings.
Ingredients Breakdown
To create the perfect Hearty Chicken & Mushroom Pot Pie, it’s essential to understand the role of each ingredient in contributing to the overall flavor and texture of the dish.
– Cooked Chicken: The star of the show, cooked chicken provides a tender, juicy base that is rich in protein. Whether you use leftover roast chicken or store-bought rotisserie chicken, ensure it’s shredded or chopped into bite-sized pieces for even distribution throughout the pie.
– Mushrooms: Known for their umami flavor, mushrooms add both depth and texture to the filling. Varieties such as cremini or button mushrooms work well, imparting a savory note that complements the chicken beautifully.
– Carrots and Peas: These vegetables bring sweetness and color to the dish. Carrots, when diced, add a subtle crunch, while peas offer a pop of bright green that enhances the visual appeal and nutritional content.
– Onion and Garlic: These foundational aromatics are crucial for building flavor. Sautéing them until they are soft and fragrant releases their natural sweetness, creating a rich base for the filling.
– Flour and Cream: The combination of flour and cream is what transforms the filling into a luscious, creamy sauce. Flour acts as a thickener, helping to bind the ingredients together, while cream adds richness and a velvety texture.
– Herbs and Worcestershire Sauce: Fresh or dried herbs like thyme and parsley elevate the flavor profile, adding freshness to the dish. Worcestershire sauce introduces a hint of tanginess and depth, enhancing all the other flavors.
– Suggestions for Ingredient Substitutions: This recipe is versatile, allowing for ingredient substitutions based on personal preferences or dietary needs. For instance, you can swap out chicken for turkey, use a medley of seasonal vegetables, or opt for a gluten-free crust to accommodate dietary restrictions.
Step-by-Step Instructions
Creating the Hearty Chicken & Mushroom Pot Pie involves several straightforward steps that will lead you to a delicious, homemade meal. Following each step carefully is key to achieving the best results, ensuring that every element of the dish comes together harmoniously.
1. Prepare the Ingredients: Begin by gathering all your ingredients. Chop the cooked chicken into bite-sized pieces, slice the mushrooms, dice the carrots, and measure out the peas. Mince the garlic and finely chop the onion to ensure even cooking.
2. Sauté the Aromatics: In a large skillet, heat a tablespoon of olive oil or butter over medium heat. Add the chopped onion and garlic, sautéing until they are translucent and fragrant, approximately 3-4 minutes.
3. Cook the Mushrooms and Vegetables: Add the sliced mushrooms to the skillet, cooking until they are browned and have released their moisture, about 5-7 minutes. Then, stir in the diced carrots and frozen peas, cooking for an additional 2-3 minutes until the vegetables are just tender.
4. Create the Sauce: Sprinkle the flour over the mushroom and vegetable mixture, stirring to coat the ingredients evenly. Gradually pour in the cream, stirring continuously to avoid lumps. Allow the mixture to simmer, thickening to a creamy consistency, about 4-5 minutes. If the sauce is too thick, add a splash of chicken broth to reach your desired consistency.
5. Add Chicken and Seasonings: Once the sauce has thickened, stir in the cooked chicken along with the Worcestershire sauce, thyme, salt, and pepper. Mix well to combine all the flavors, allowing the filling to heat through for another 2-3 minutes.
6. Assemble the Pot Pie: Preheat your oven to 400°F (200°C). Transfer the filling to a pie dish or individual ramekins, spreading it out evenly. Roll out your pie crust and lay it over the top of the filling, trimming any excess dough. Cut a few slits in the crust to allow steam to escape during baking.
With these initial steps complete, you will be well on your way to creating a Hearty Chicken & Mushroom Pot Pie that is sure to impress family and friends alike. Stay tuned for the next part of this article, where we’ll delve into the baking process and tips for achieving the perfect golden crust.
Preheating the Oven
Before diving into the cooking process, it is essential to preheat your oven to 400°F (200°C). This temperature is ideal for ensuring that your pot pie bakes evenly and develops a beautiful golden-brown crust. Preheating not only saves time but also helps in achieving a crisp texture, which is vital for a delicious pot pie. While the oven is warming up, you can focus on preparing the filling and crust.
Cooking the Vegetables: Tips on Achieving the Perfect Sauté
Sautéing vegetables is a crucial step in creating a flavorful filling for your pot pie. Start by heating a tablespoon of olive oil or butter in a large skillet over medium heat. Once the oil is shimmering, add your chopped onions, carrots, and celery. These aromatic vegetables form the flavor base of your filling.
Sautéing Tips:
– Don’t Overcrowd the Pan: If your skillet is too crowded, the vegetables will steam instead of sauté, leading to a lack of color and flavor. Cook in batches if necessary.
– Stir Frequently: Keep the vegetables moving to ensure even cooking. This will help them caramelize and develop a deeper flavor.
– Cook Until Tender: Aim for a soft texture without browning the vegetables too much—about 5-7 minutes should suffice. You want them tender but not mushy.
– Add Mushrooms Last: Since mushrooms release moisture, add them after the initial sauté of the other vegetables. This will prevent the filling from becoming watery.
Making the Sauce: How to Avoid Lumps for a Smooth Consistency
To achieve a velvety sauce that binds your filling, you’ll need to create a roux. In the same skillet where you sautéed the vegetables, sprinkle in 1/4 cup of all-purpose flour, stirring constantly for about 1-2 minutes. This cooking process helps to eliminate the raw flour taste.
Steps for a Smooth Sauce:
1. Gradually Add Liquid: Slowly pour in 2 cups of chicken broth while whisking continuously. This gradual addition is crucial for preventing lumps.
2. Incorporate Cream: For added richness, stir in 1/2 cup of heavy cream after the broth is fully incorporated. This will create a creamy texture that enhances the overall flavor.
3. Season: Don’t forget to season with salt, pepper, and fresh herbs like thyme or parsley for an aromatic touch. Allow the sauce to simmer until it thickens, about 3-5 minutes.
Combining the Filling with Chicken: Ensuring Even Distribution of Flavors
Once your sauce has thickened, it’s time to combine it with the cooked chicken. If you haven’t already prepared the chicken, you can poach or roast it beforehand. Shred or dice the chicken into bite-sized pieces and add it to the skillet along with the sautéed vegetables.
Tips for Combining:
– Mix Thoroughly: Stir the mixture until all components are well coated with the creamy sauce, ensuring that flavors are evenly distributed throughout the filling.
– Taste for Seasoning: Before proceeding, taste your filling and adjust seasoning as necessary. This is your opportunity to enhance flavors, so don’t hesitate to add more herbs or spices if desired.
Preparing the Pie Crust: Techniques for Handling Refrigerated Crusts
Using refrigerated pie crusts can save time and yield excellent results if handled correctly. If you prefer homemade, feel free to use your favorite recipe, but for convenience, store-bought crusts are perfectly acceptable.
Techniques for Handling Refrigerated Crusts:
1. Keep the Dough Cold: Refrigerated crusts should be kept cold until you’re ready to work with them. This helps prevent the fat from melting, which is crucial for a flaky texture.
2. Roll Out Gently: On a lightly floured surface, carefully roll out the dough to fit your pie dish. Avoid excessive handling, as this can lead to a tough crust.
3. Transfer with Care: If using a pie dish, gently place the rolled dough into the dish, pressing it against the bottom and sides without stretching it. Trim excess dough, leaving a slight overhang for crimping.
Baking: Tips on Achieving a Golden-Brown Finish and How to Check Doneness
With your filling and crust ready, it’s time to assemble and bake your pot pie. Pour the filling into the prepared crust, then cover with a second layer of crust. Crimp the edges to seal and cut a few slits in the top to allow steam to escape.
Baking Tips:
– Brush with Egg Wash: For a shiny, golden crust, brush the top with a mixture of beaten egg and a splash of water before baking.
– Bake at the Right Temperature: Place the pie in your preheated oven and bake for about 30-35 minutes or until the crust is golden brown and the filling is bubbling.
– Check for Doneness: The filling should be visibly bubbling through the slits, and the crust should have a rich golden color. If the edges brown too quickly, cover them with foil to prevent burning.
Baking Tips for Perfect Pot Pie
Common Mistakes to Avoid
– Overcooking the Filling: Make sure not to overcook your filling before baking, as it can become dry. The filling should be just heated through, as it will continue to cook in the oven.
– Burning the Crust: Keep an eye on your pot pie as it bakes. If you notice the crust browning too quickly, use foil to shield the edges.
Achieving a Flaky Crust
– Minimize Dough Handling: The less you handle the dough, the better. This allows the fat to remain cold, resulting in a flakier texture.
– Use Cold Ingredients: For the best results, ensure your butter and water (if making your own crust) are cold before mixing into the flour.
Oven Temperature Variations
Ovens can vary significantly in temperature. If this is your first time using a particular oven, consider using an oven thermometer to ensure accuracy, as this can affect baking times. If your oven runs hot, check your pot pie a few minutes earlier than the recommended time.
Serving Suggestions
Your Hearty Chicken & Mushroom Pot Pie is a delightful main dish that pairs well with various sides. Here are some ideas to create a balanced meal:
– Simple Salad: A fresh green salad with a light vinaigrette complements the richness of the pot pie. Consider adding ingredients like cherry tomatoes, cucumber slices, and a sprinkle of feta cheese.
– Crusty Bread: Serve with a side of warm, crusty bread or dinner rolls to soak up the creamy filling.
– Garnishing: For an elegant touch, garnish your pot pie with freshly chopped herbs like parsley or thyme before serving. This not only adds color but also enhances the dish’s aroma.
The versatility of pot pie means it can be served on various occasions—from cozy family dinners to festive gatherings. Feel free to customize the filling or crust based on the season or your preferences.
Storing and Reheating Your Pot Pie
If you have leftovers (which is rare with such a delicious dish), here’s how to store and reheat your pot pie while maintaining its quality:
Best Practices for Storing Leftovers
– Cool Completely: Allow the pot pie to cool to room temperature before storing it. This helps prevent condensation, which can make the crust soggy.
– Refrigerate: Store leftovers in an airtight container in the refrigerator for up to 3 days. If you want to keep it longer, consider freezing it.
Guidelines for Reheating
– Oven vs. Microwave: For the best texture, reheat in the oven. Preheat your oven to 350°F (175°C), cover the pie with aluminum foil to avoid over-browning, and heat for about 20-25 minutes, or until warmed through.
– Microwave: If you’re short on time, you can microwave individual portions, but be aware that this may result in a softer crust. Heat in 30-second intervals until warm.
Conclusion
The Hearty Chicken & Mushroom Pot Pie is a classic comfort food that brings warmth and satisfaction to any meal. With its flaky crust and rich, savory filling, this dish is perfect for family gatherings or cozy weeknight dinners. The process of making your pot pie can be a joyful experience, allowing you to create something meaningful to share with loved ones.
We encourage you to try making this recipe in your kitchen, embracing the delightful experience of home cooking. The flavors and aromas will draw your family and friends together, making it a dish that’s not just a meal but a cherished memory. Enjoy the art of cooking and the satisfaction that comes from sharing homemade meals with those you care about.
